Google Analytics

Monday, August 29, 2011

Cheap and Easy and YUMMY Chili (for 2)


It has been a cool 70 degrees today, and around 50 degrees in the evenings here in South Eastern West Virginia. Weather like this makes me crave for Fall, and everything that comes with the Fall Season. I love a good, thick, spicy chili on cool evenings. This recipe is super fast and easy and can be whipped up in less than 1/2 an hour. It is also delicious, and to me, it tastes better than all those fancy chilis that cook all day and have 100 ingredients.

Needed:
*1 package McCormick's chili seasoning (I like the HOT, but it IS HOT)
*1 lb Lean Ground Beef
*2 -15oz cans tomato sauce (or undrained crushed tomatoes)
*1 can kidney beans drained
*1 small onion - chopped
*1 bell pepper - chopped

1. In a large saucepan brown the beef adding the onions and peppers while cooking.
2. When beef is browned and veggies soft, add the dry McCormick's seasoning packet and stir.
3. Cook for 1 minute and then add both cans of tomato sauce.
4. Add kidney beans and cook for 5 minutes, or until hot.
5. Serve with shredded cheese, sour cream, and/or crackers!

Makes 4 small bowls or 2 large bowls.


Friday, August 26, 2011

2 Quilts in 1 Week


I'm on a ROLL!!! I have finished two quilts in 1 week!!! I'm so proud of myself. It just goes to show that when you pull out a UFO or WIP and actually FINISH it, how much it motivates you to keep going.. and going. . and going. So if you're lagging behind.. . . . just START. . it's the hardest part. Then, when you're finished, and have that overwhelmingly happy giddy feeling of Pride and accomplishment, you'll have no trouble picking out another UFO from your ever growing stack.

I'd like to share what I just recently finished and I hope you like it:


This one, which I simply have titled "Red, Black and White" Quilt, is now available at my etsy shop for a very humble price I must say. To just be able to finish them I'm very excited. But to earn a wee bit of cash and know that someone else will enjoy them is just enough for me!! So I just ask for approximately what I have in materials. . that's it.
Please visit my etsy shop for this quilt HERE.


~~~~~~~~~~~~~~~~~~~~~~~~~~~~~~~~~~~~~
~~~~~~~~~~~~~~~~~~~~~~~~~~~~~~~~~~~~~

So what else have I been into as of late? I also just recently finished 3 amazingly quilted/embroidered totes. I can't show you those yet, but I CAN show you another tote I just recently finished. My dear dear friend Megan, who will be moving away to Florida soon (so sad) ordered her most probably very last item from me. She requested I make her a quilted laptop case. I have made TWO so far including this one. The first, was for my mother, and I believe it turned out rather well. To check out the one I made for my mother click HERE.
The tutorial I used was THIS ONE although I did add to Megan's bag an outside pocket. For both Megan AND my mother's bags I added quilting, AND a handle/strap. This makes the bag less like a "sleeve" and more like a "tote."

Here's the end result of Megan's Laptop bag:
m1

m2

m3

Megan found the fabric from fatquartershop.com and the tote required 1/2 yard each outside and lining fabric...with no leftovers. Instead of using fusible fleece, I just used regular old cotton/poly batting. I did however iron/press my batting down so it wasn't so "fluffy." I believe it does sort of the same thing as fusible and even STICKS to the fabric!
Doesn't her new laptop bag SCREAM Florida?!?!

Monday, August 22, 2011

NEW Quilt for Sale


I just finished a UFO!! It was the 3rd in a series of Grey study quilts which used a combination of Bright rainbow-colored fabrics as well as grey print fabrics.

To see all the grey study quilts go to www.Facebook.com/KatiesQuiltsandCrafts ~ be sure to "like" me while you're there ;c) OR you can see them on my flickr slideshow on the sidebar to the right ----->


I quilted this quilt VERY densely with an ALL-over pattern that could be sorta described as McTavishing. It's my own little twist on McTAvishing. . should I call it McKatying? LMAO juuustttt kiddding.

Since I used this quilt for practice quilting I'm not charging too much for it on etsy. But it DID take a VERYYY long time to finish. I think I started this quilt. . . hmmm. . . . 6 months ago maybe? I know it was before Christmas last year.

To view the BRAND NEW etsy listing for this item go here: http://www.etsy.com/listing/80298141/rainbow-grey-quilt-no-3-double-sided


Love Affair with My Brother ~ Giveaway!!!

Love Affair with My Brother in combination with Fat Quarter Shop is hosting a giveway of a beautiful Jelly Roll of fabrics "Hometown" by Sweetwater.

Head on over to thier BLOG now . . you have 5 CHANCES TO WIN!!! WOO HOO!!!

I might just have to make a Bento Box if I won! ;c)

Saturday, August 13, 2011

Rachel's Tee-Shirt Quilt

I finished my sample tee-shirt quilt for the class I will be hopefully teaching very soon.
My dear friend-of-the-family Rachel was kind enough to let me use HER tee-shirts as a sample for class. She will of course receive her finished quilt AFTER the class has been completed ;c)

She had a very nice mix of tee's - alot of color! I think every tee-shirt quilt should have at least ONE tie-dye ;c)

So here it is:
This is the front/top of the quilt.


For the back I pieced together some pretty Amy Butler Teal-colored fabrics.


Closeup of one of the "blocks" -


Closeup of the tie-dyed block -


Closeup of another one of the blocks -


I call this style of tee-shirt quilt "tetris" style. which means it does NOT use uniform-sized blocks and it does NOT use sashing.

If I get enough interest, I might offer a tutorial on how to do this . . but not until AFTER the class is over... ;c)

The tutorial for how to prepare your tee-shirts for a tee-shirt quilt can be found HERE.
~~~~~~~~~~~~~~~~~~~~~~~~~~~~~~~~~~~~~~~~~~~~~~~~~~~~~~~~`

What else am I working on??? My friend JRB has put me to "work" making some beautiful totes as seen HERE. Of course I can't consider this "WORK" at all because I absolutely LOVE it!!

Also on my TODO list - I'm making a quilt as a secret gift for a friend of mine and his wife but I can't say much about that at this point ;c) TOP SECRET.

One other project that is in the works right now is "Lucia's Memory Quilt" I am making a snowball signature quilt for a lady who is adopting a daughter from Mexico. She is raising funds for the adoption fees and this quilt is one way we can help. There are several sponsorship levels and options. You can choose to just have your signature in one block, a Bible verse, or even a PHOTO. If you would like to be a part of this very special project you can go see Tracy on her blog HERE.

Sunday, August 7, 2011

Preparing Shirts for Tee Shirt Quilt

Here is a small photo tutorial on how to prepare your tee-shirts for a tee-shirt quilt.
I am in the process of making a tee-shirt quilt class available and want for my students to be able to finish the whole quilt IN CLASS. In order for us to finish the whole quilt, you will have to do your fusing at home. This is not a difficult process at all, just time consuming.

What you will need:
*1 bolt of of Pellon Fusible Stabilizer (Available at Jo-Ann's for $9.99 - look for a coupon)
Pellon Interfacing Lightweight Fusible 40 YD BOLT White

*Tee-Shirts
*Scissors
*Iron
*Spray bottle with water
*1 yard of cotton quilting fabric (you can just use a scrap piece, this is just to protect your iron)
*An Ironing board or several towels to protect your ironing surface


~~Click on any of the photos below to view them larger~~~
**Make sure to wash all of your tee shirts thoroughly with hot water especially if they are new. Do not add any fabric softener or spray starch.**

Cutting the Shirts:
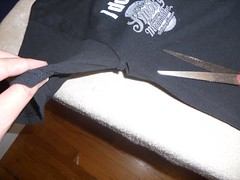
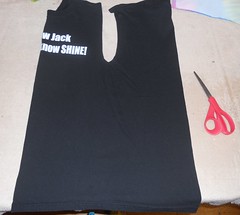
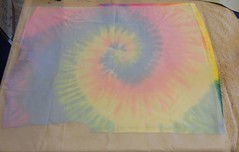
1. Lay out your Tee, and smooth it out.
1a

2. Make a small slit in the armpit of one of the sleeves.
1b

3. Stick your scissors in the slit and begin cutting - cut just INSIDE the seam until you have the whole arm part completely cut off.
1c

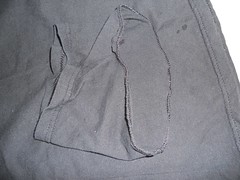
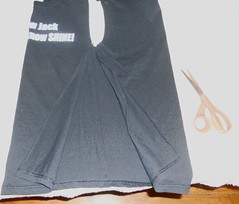
4. Here you can see where the seam is cutoff WITH the arm piece of the tee.
1d 1v

5. Repeat this step for the other Arm piece - your tee should now look like this:
1e 1u

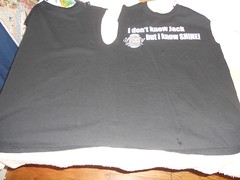
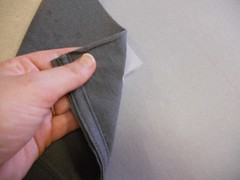
6. Pick up your shirt like this, you will now be cutting the shirt along the shoulder seam
1f

7. Cut along Both shoulder seams, it doesn't matter which side the seam is on - you can even cut those off if you wish.
1g

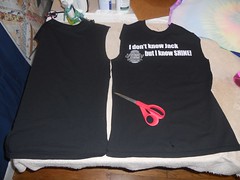
8. Carefully fold your shirt in half lengthwise to find the side seam. If there is no side seam try to just eyeball it.
1h

9. Cut along the side seam and repeat for the opposite side.
1i 1j 1k

Fusing the Shirts:
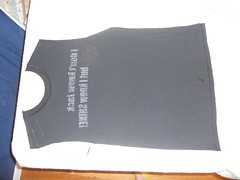
~~You will only be using the side of the shirt that has a logo on it. Sometimes there will be a logo on the front AND back, in that case you will fuse BOTH sides. ~~

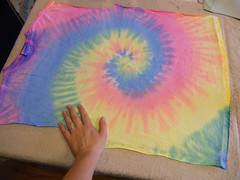
1. Lay out one of your tee shirts, Right-side down, WRONG side facing you. Smooth out your shirt with your hands.
1w 1l

2. Get out any wrinkles by PRESSING with your iron on medium-high heat.
***You will not be IRONING at all, what you are going to be doing is PRESSING. Start in the center of your shirt and press down slightly with your iron. Press for a few seconds and then pick your iron all the way up, and lay it down next to the indention you just left. You will be able to see the indention the iron made previously, and so you will be able to see where you have already pressed and what has NOT been pressed. Please try to avoid ironing, (sliding the iron back and forth over your tee shirt) we are working with knits which are easily stretched. Once the woven stabilizer is fused, it will keep the tee shirt from stretching. If the shirt is already stretched when the stabilizer is fused, it will be stretched permanently. . . which is not a good look! ;c)
1x 1m

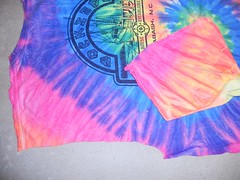
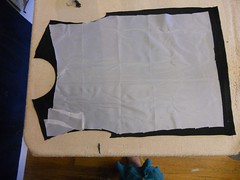
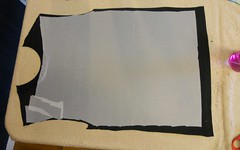
3. Place the stabilizer *rough* side down on your tee shirt. Cut the stabilizer to fit just inside your tee-shirt, because you don't want any fusible on your ironing surface ;c)
1y 1n 1z 2a

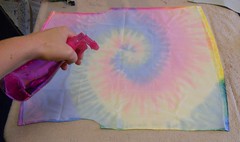
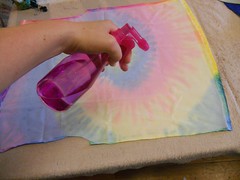
4. Spray a generous amount of water over top of the stabilizer. You want it damp but not soaking wet. Remember that if it doesn't stick the first time, you can just go over it again.
1o 2b 2c

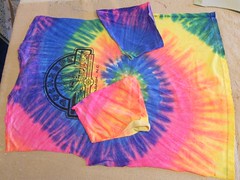
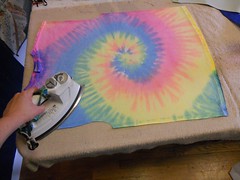
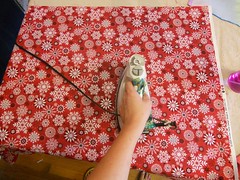
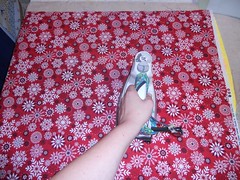
5. Lay a piece of cotton quilting fabric over top of your work, wrong side down. Press your fabric like in step 2 above. This time you will want to use medium-high heat, and press each section for at least 5 seconds.
1p 2d

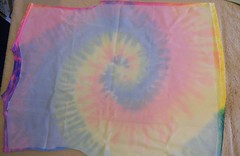
6. Now your piece should be nice and smooth and look a little something like this:
1q 2e
*BTW, you can use scraps of stabilizer if your piece doesn't fit the whole shirt. Just overlap the scraps just a bit, and it will be just fine.

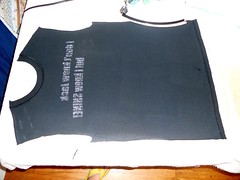
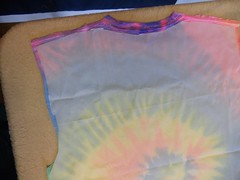
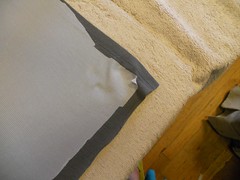
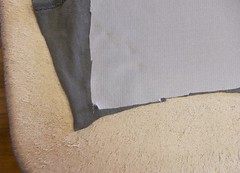
7. Check all corners of your stabilizer to make sure they are all thoroughly fused. Pull gently on the stabilizer - if it comes off easily like this - then you need to re-fuse. Spray a little water, cover and press again.
1r

8. If your stabilizer doesn't come off - or tries to shred like this - you are finished.
1s 1t

If you have any questions - feel free to email me - or ask in the comments section, I will respond ASAP.