Google Analytics

Monday, August 27, 2012

Brady's Baby Clothing Quilt & Sammy's Baby Quilt

I can make your own custom baby clothes quilt-
**See my facebook page for ordering and pricing information**

Two finished for the last few weeks.  I wanted to share them both with you guys here.
First, I finally got the opportunity to make a quilt out of baby clothes!  There was a mixture of knits, wovens, and fleece.   AND, since the clothes were so small, it was especially difficult to capture the WHOLE shirt logo without cutting into the arm seams.   BUT, we did it, and I think it turned out awesome!

 That's MOM (Beth) on the left, with her son Brady. . and that's me on the right.  We're in Jacqueline's back yard.. .she is Brady's grandmother (Beth's Mom.)  Her back yard is perfect for photos!!
Here's a photo of the back of the quilt, I used leftover woven fabric from Brady's little dress shirts, on the back.  Strip pieced them, and then added them in between two layers of Xtra wide quilt fabric!
And I just wanted to share with you my graph for this quilt.  As I've said before, every SINGLE quilt, for me, starts with a graph.  Graphing out my quilts is especially important for T-shirt quilts. I measure each block, then write in a brief (and I mean REALLLLY brief) description of each shirt inside the block.   Since we were doing BABY shirts, these blocks were especially SMALL. . making it especially CHALLENGING!   I thought this graph was really funny, and I'm glad noone else has to decipher it but me! LOL


My next quilt was a quilt for our church choir director Jack.  He recently had a baby boy and named him Sammy.   He told me to make whatever quilt I wanted, but gave me these specs:   Colors- blue and brown, Theme: Traditional.   When he told me this, I immediately thought:  SCRAPPY!!!   So, I went to the trusted QUILTVILLE site to look for a fun pattern to use for scraps.   I have always been drawn to her PLAYING WITH JACKS pattern, and so it was.

 I pulled out my 2.5" strips of Browns, Neutrals, and Blues.
 Here are all of my "jacks on six" or "double x" blocks finished and pressed!  They don't look like much now do they?  haha
 Here is the completed center top
 Top complete with borders!
 I REALLLLLY had fun quilting this quilt!!  I just love quilting patchwork !   And surprisingly, I don't get to do it very often!
 I stippled in all the neutral areas so that the "Xs" would POP!  Then I went in and did a one-line outline quilt all around the rest of the patches.
 I fused Sammy's initials onto the back of the quilt.   I did this after I made the sandwich, and just quilted over them!
 I tried something different with the feathers this time around - I quilted my feathers, and then did an echo stitch back down to the starting point.  I really REALLY like the way it looks, and plus, it's easier!  YOu don't have to either make a stop, and then reposition, OR follow your feather vein all the way back down!
 I really like this photo of the quilt - it shows off the quilting AND the back.
 Thank you hubby for helping me photograph (it's like pulling teeth God-love him!)
 We got a little bit of sunshine on the quilt, showing off the feathers!


Sunday, August 26, 2012

Please Vote for ME! =cD


PLEASE PLEASE Vote for my quilt 'Painted Dahlia" on this week's quilting contest!!
I think I might actually be able to win one of these!! YAY!!!!
Thank you!

http://quiltinggallery.com/2012/08/24/vote-now-solids-quilt-contest/

Sunday, August 12, 2012

Quilted Coasters Tutorial- with Aurifil Poly Longarm Thread


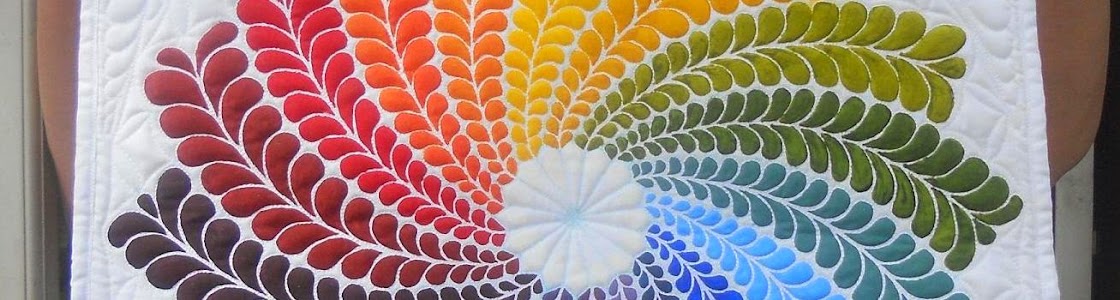
Last week I got the opportunity to try out the new Polyester Longarm Thread by Aurifil.   I first wanted to see how it worked in my Janome DSM.  These quilted coasters were the result.
These coasters are very versatile, you can make them any size you want, and you really don't even HAVE to quilt them.  BUT, since quilting is my favorite part, I couldn't resist going a little feather crazy on these ;c)

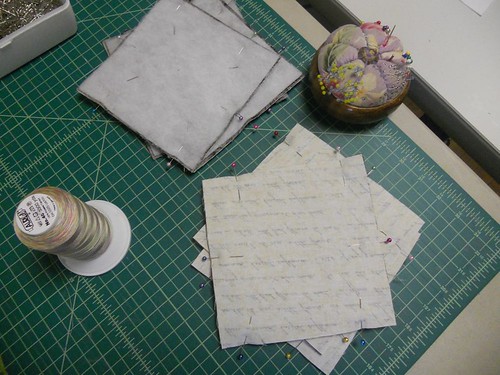
Here's what you will need for 6 coasters:

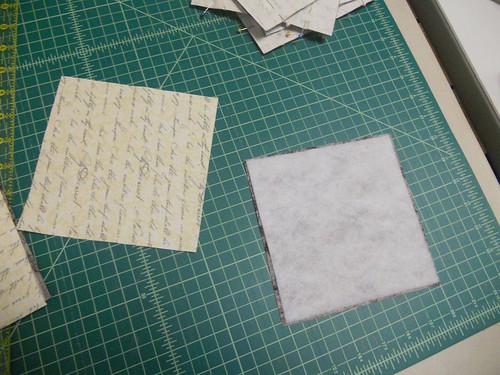
*12 equal sized fabric squares (I used 6")
*6 squares of batting, that are cut 1/2" smaller than your fabric squares. (5.5")
*Glass-head Pins
*Safety Pins
*Sewing Thread
*Pretty Quilting Thread (suggested: Aurifil!)
*Scissors
*Sewing Machine (Walking Foot and Darning Foot recommended!)
*Iron and Spray bottle of water

Instructions:

1.  Cut your squares of fabric and squares of batting.  I used contrasting fabrics because I wanted to see what the thread would look like on dark AND light fabrics.   You could use all the same fabrics, or go totally scrappy if you wish.

2.  Lay one piece of fabric, Right-side DOWN, with a piece of batting centered on top.
a2

3.  Flip this over, so that the batting is on the bottom, and the fabric is Right side UP.
a3
Place a few pins in the center to secure the batting to the fabric.

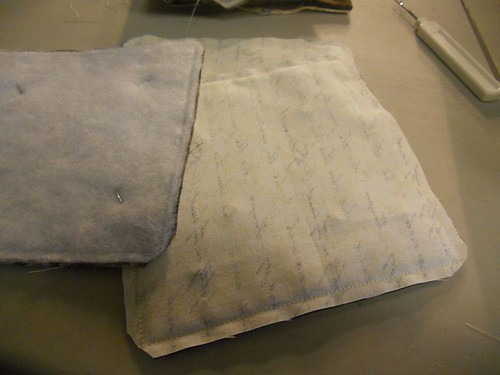
4.  Now lay your next piece of fabric RIGHT SIDE DOWN  on top of the batting and 1st piece of fabric (so the right sides will be facing each other at this point ) a5

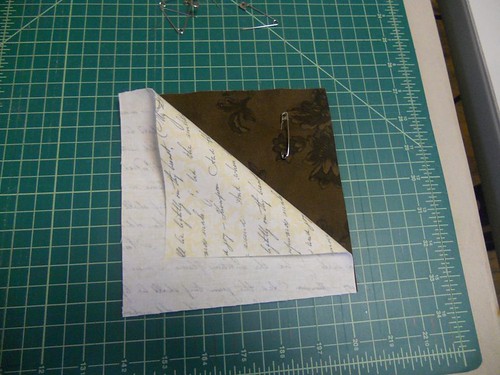
5.   Secure the edges with pins.   (These do not have to be glass head pins) a7

6.  Here's a photo showing what both sides should look like before heading to the sewing machine.  a9

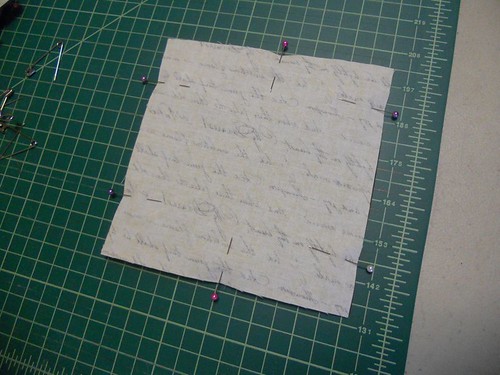
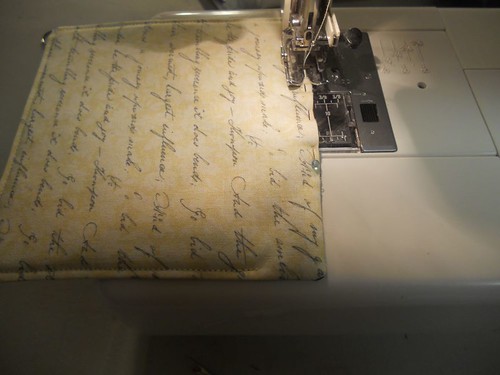
7.  Start sewing your pieces together.   You will want to sew just under (scant) 1/4" seam. This is much easier with a walking foot.
b1
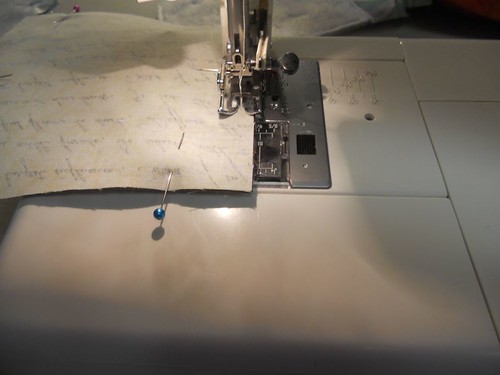
Start sewing at about an inch away from one of the corners.

8.  Pivot at the corners, b2

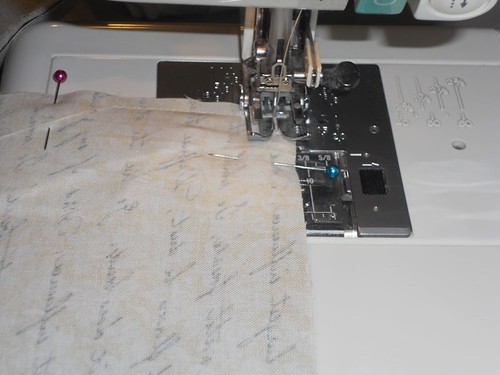
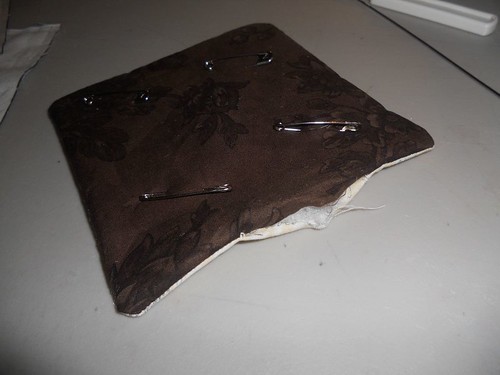
9.  Continue sewing all the way around, but leave a couple inches UNsewn.  Backstitch to secure.
b4

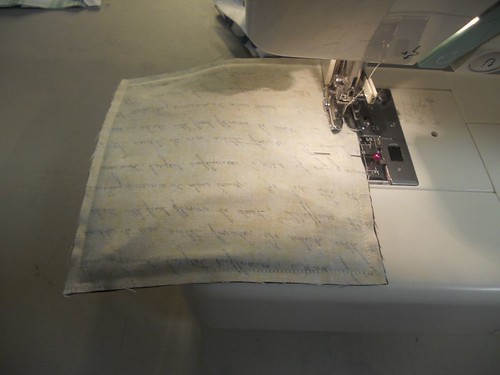
10.  Now it should look like this:  b6   Trim your corners if you want,  or leave them UNtrimmed for more rounded corners.  b8

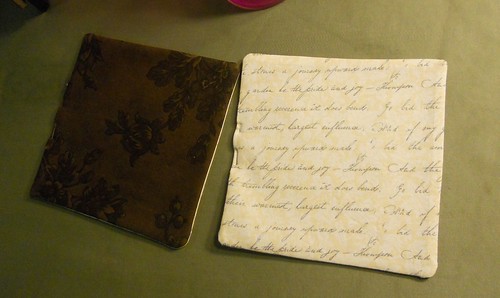
11.  Flip the whole thing inside out - it should look like this:  b5

12.  Fold the seams of the open area in, and secure with a glass-head pin.  Spritz with water, and iron your quilt sandwich flat.  b9

13.  Start sewing around the edges, about 1/8" away from the edge.
c1  
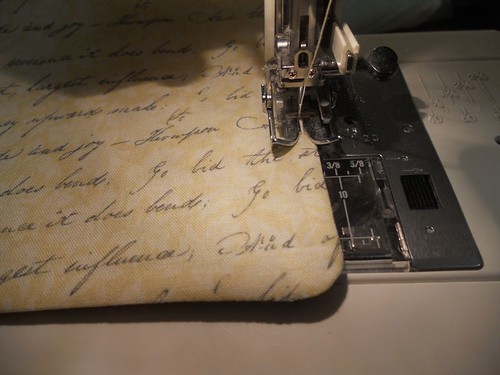
Remove the pin and secure the opening. c2

14.  Now they should look a little something like this:  c3   
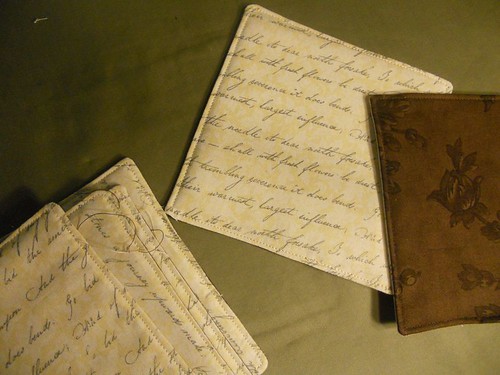
Really, you could stop here. . And most sane people probably WOULD!

15.  Lastly, if you wish, you can quilt as desired.  I chose to go feather crazy.  c4

c7


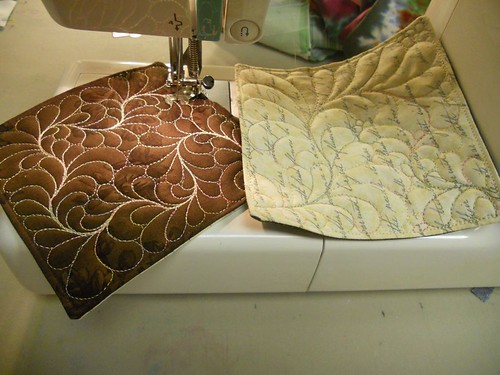
***Also, if you would like to quilt your coasters like me, this is how I do it:
Start in one corner, and make a squiggly line:
c5

Follow that line back to the beginning, and then start making your feathers on whatever side is easiest for you to start with.  For me it is the right side of the feather vein.  c6

Then go back to the beginning, and do the other side.  c8

I used Aurifil's Polyester Longarm Thread for the top AND Bobbin in this project.   It worked beautifully in my DSM (Janome.)  BUT, you will have to have a vertical thread holder because the cone is very big.  
I also quilted a whole quilt with this thread in my longarm (Juki.)  It did not work very well in the TOP, because the spool is so heavy, it didn't want to turn smoothly, making the tension mess up, and thread break.  BUT, I quilted the whole quilt successfully using it as the bobbin thread.   I actually LOVED it as the bobbin thread.   Not only is it totally lint-free, but it has that same amazing Aurifil property in that you can wind SO MUCH in just one bobbin!  I only had to use 4 bobbin-fulls for a 50" x 60" quilt!  What's not to love?!?! 


Friday, August 10, 2012

4 Clothing Quilts


I recently reconnected with a friend I went to school with via facebook.  Elizabeth does quilling, makes jewelry, and the occasional quilt.  I also befriended her mother on facebook.  Elizabeth's Mom, Jacqueline, lost her Mother recently.  Jacqueline and Elizabeth saved a bunch of her clothing with the intention of having it made into a quilt.   Jacqueline separated the clothing by color into 4 stacks, and each stack would be made into a different quilt.  

I've made several T-shirt quilts, but never made a quilt out of just clothing.   To be honest, a year ago, I probably wouldn't have felt confident enough to make a quilt out of clothing.   Working with a variety of different fabrics raises the difficulty level significantly.  Some fabrics are stretchy, some are very thin, and some fray like crazy.  Using a lightweight fusible stablizer on some of the stretchy and thin fabrics helped a great deal.  All-in-all I think they turned out quite well.  I gained alot of confidence with these quilts and look forward to working with clothing again. 
These are the stacks of clothing, after I had removed all of the seams, and unusable stuff.  

I started with the blue fabrics first.  Since there were more of them than the others, I choose the blues to use for the Log Cabin quilt.   This is a combination of log cabin blocks and pocket blocks.  (Pockets from the clothing) This is actually the first time I have made a log cabin quilt.  Strips are 1.5" finished. 


Next quilt I started on was the purples.  Here are all of my squares, with drawn stitching lines for HSTs.  

and here are all my HSTs, pressed and ready to be sewn. =cD

The finished top.  

I used the "Trail to Treadlonia" block for the greens.  Since there were not a whole lot of green fabrics, I used a white background fabric for this quilt.  

Here are all my TTT blocks trimmed, and a pile of trimmings. ;c) 

TTT blocks hanging on the wall.  I was thinking about adding the pockets to this one, but it didn't look quite right. 

For the red group, I kept it simple.  Just some simple 3" finished squares and pockets.  

Here are all my quilt tops, and backings.  The backings are all homespuns. 

 Closeup shot of the quilting on the green quilt.  For the Green and Red Quilt I used this super thick batting.  It was very hard on my back and shoulders, but it really turned out good I think.
 Quilting on the Red quilt.
Quilting on the Blue Quilt

Quilting on the Purple Quilt


Finished Purple Quilt

Finished Red Quilt

Finished Blue Quilt

Finished Green Quilt